This post may contain affiliate links. As an Amazon Associate, I earn from qualifying purchases.
Instead of using vegan butter, this recipe uses butter-flavored vegetable shortening to achieve a perfectly flaky dairy-free pie crust.

There’s something magical about a traditional pie crust. Made from simple ingredients—flour, salt, water, and either butter or shortening—this humble dough transforms into a golden, flaky masterpiece when baked. It’s a testament to the beauty of simplicity in baking.
This traditional pie crust is a staple in many homes, including ours. The process starts with mixing flour and salt, then cutting in cold fat (butter, or shortening in this case) until the mixture resembles coarse crumbs. A mixture of flour and ice water is then added gradually to bring the dough together without making it too wet. The dough is then chilled, rolled out, and fitted into a pie pan. This straightforward method has been used for centuries, yielding consistently delicious results.
In a way, learning to make a pie from scratch is a rite of passage for many home bakers. It symbolizes mastering a timeless skill and connects us to past generations. Traditional pie crust recipes are often passed down through generations, carrying with them family history and cherished memories. Baking a pie using your grandmother’s recipe, for example, can be a way to honor her memory and keep family traditions alive. It’s a connection to the past, a way of preserving a piece of your heritage. And the process of creating a pie from simple ingredients just feels good.
Equipment Needed to Make Dairy-Free Pie Crust
These basic tools will help ensure your pie crust turns out perfectly every time:
- Mixing Bowl: A large bowl to mix the flour and salt. These mixing bowls are great.
- Pastry Cutter or Fork: To cut the shortening into the flour mixture. Find my favorite pastry cutter here.
- Measuring Cups and Spoons: For accurate measurement of ingredients. I’ve had these measuring cups and measuring spoons forever.
- Rolling Pin: To roll out the chilled dough. A good basic wooden rolling pin works well.
- Plastic Wrap: For chilling the dough in the refrigerator.
- Pie Pan: To shape and bake the crust, find a basic glass pie plate.
- Wax Paper (optional): For easier rolling and transfer of dough.
- Pie Weights or Dried Beans (optional): To prevent the crust from puffing up during blind baking, use pie weights.
- Knife or Kitchen Shears (optional): To trim the excess dough from the edges. (Most of the time, I just fold the edges under instead of trimming them. Who doesn’t love extra crust?!)
- Fork or Finger: For crimping the edges and piercing the dough to release steam.
Ingredients for the Best Vegan Pie Crust / Dairy Free Pie Crust
- 2 1/4 cups all purpose flour
- 1 teaspoon salt
- 1/3 cup cold water
- 1 cup butter-flavored Crisco vegetable shortening (best if cold)
Note: this makes a double crust pie; for a single crust, cut the recipe in half.
Directions
- In a large bowl, combine the flour and salt. Whisk them together until well mixed.


- Remove 1/4 cup of the flour mixture and whisk into 1/3 cup of cold water in a separate bowl or measuring cup.


- Add the cold shortening to the flour mixture. Use a pastry cutter or two knives to cut the shortening into the flour. The mixture should resemble coarse crumbs with pea-sized pieces.


- Add the flour-water mixture to the flour-shortening mix and mix gently, just until combined. (Note: I like to use one hand for this, but a wooden spoon works well, too.)


- Gather the dough into a ball. Divide it into two equal portions.

- Flatten each portion into a disc and wrap each tightly in plastic wrap. (Note: if freezing, wrap the disc tightly in two layers of plastic wrap and place inside a freezer bag before popping in the freezer.)


- Refrigerate the wrapped discs for at least 15 minutes. This step is crucial for a tender, flaky crust.
- After chilling the dough, unwrap and place the disc between two piece of wax paper. (If you don’t have wax paper, lightly flour your work surface and rolling pin.) Roll out one dough disk into a circle about 1/8 inch thick. Ensure it’s large enough to fit your pie pan with some overhang.


- Carefully remove one piece of wax paper and lift the rolled dough and place it into your pie pan.
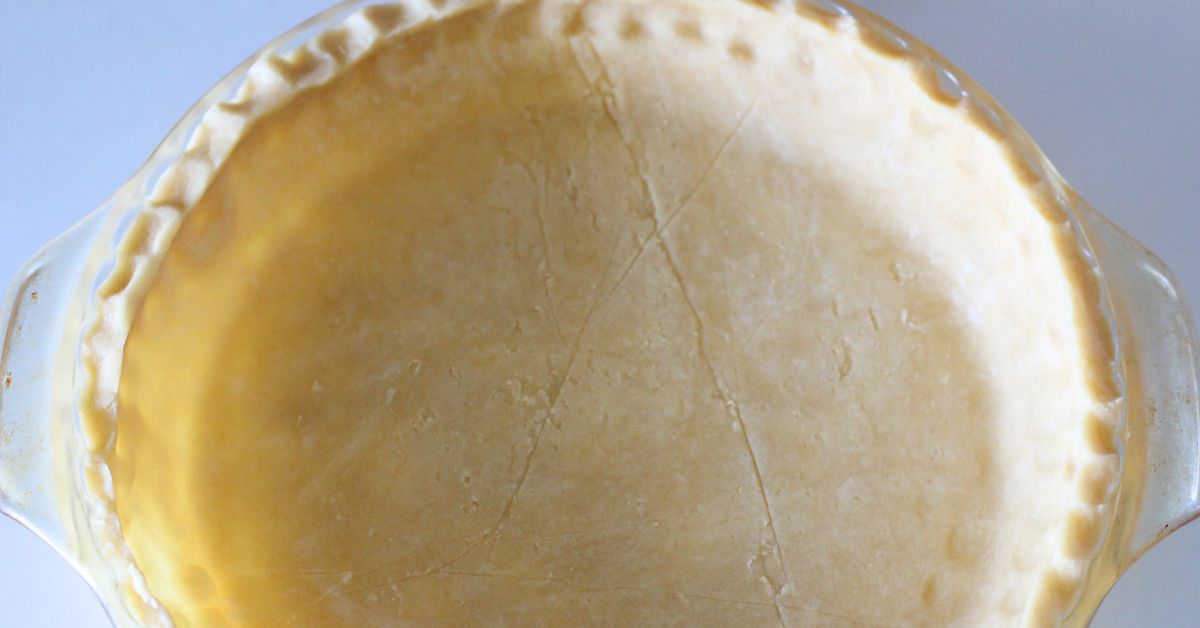
- Carefully remove the second sheet of wax paper and gently press the dough to fit the pie dish, leaving some overhang around the edges.


- Trim the excess dough, leaving about 1 inch hanging over the pan’s edge. Fold this under to form a thick edge. Crimp the edge using your fingers or a fork.


- If making a single-crust pie, add your pie filling. For a double-crust pie, roll out the second dough disk and place it over the filling as the top crust. Trim and crimp the edges as before. Bake according to your pie recipe’s instructions.

Tips for Success
- Keep all ingredients cold, especially the shortening and water.
- Don’t overwork the dough; handle it as little as possible.
- Chill the dough before rolling it out to prevent shrinking.

How to Freeze Pie Crust
By following these steps, you can have homemade pie crust ready at any time, making your pie-baking process even more convenient.
Freezing Unbaked Pie Crust Dough
- Prepare the Dough: Follow the recipe to prepare the pie crust dough.
- Form the Dough Disks: Divide the dough into two equal parts (if making a double crust). Shape each part into a flat disk about 1 inch thick.
- Wrap the Dough: Wrap each dough disk tightly in plastic wrap. Ensure there are no air pockets to prevent freezer burn.
- Label and Freeze: Place the wrapped dough disks in a resealable freezer bag. Label the bag with the date and contents. Freeze for up to three months.
Freezing Rolled-Out Pie Crust
- Prepare the Dough: Follow the recipe to prepare the pie crust dough and chill it as usual.
- Roll Out the Dough: On a lightly floured surface (or using the wax paper method), roll out the chilled dough to the desired size for your pie pan.
- Wrap the Dough: Lay a piece of parchment paper or wax paper on a flat surface. Place the rolled-out dough on the paper. Carefully roll the dough up with the paper to prevent sticking. Wrap the rolled-up dough in plastic wrap.
- Label and Freeze: Place the wrapped, rolled-out dough in a resealable freezer bag. Label the bag with the date and contents. Freeze for up to three months.
Freezing a Pie Shell in the Pan
- Prepare the Dough: Follow the recipe to prepare the pie crust dough and chill it as usual.
- Roll Out and Fit the Dough: Roll out the chilled dough and fit it into your pie pan. Trim and crimp the edges as desired.
- Freeze the Pie Shell: Place the pie pan in the freezer until the dough is solid, about 1-2 hours.
- Wrap and Store: Once frozen, wrap the entire pie pan with the dough in plastic wrap, then in aluminum foil for extra protection. Label with the date and contents.
- Freeze: Store the wrapped pie shell in the freezer for up to three months.
Using Frozen Pie Crust
- Thawing: When ready to use, thaw the dough disks or rolled-out dough in the refrigerator overnight. For pie shells frozen in the pan, you can fill and bake them directly from the freezer; just add a few extra minutes to the baking time.
- Baking: Proceed with your pie recipe as usual. For blind baking a frozen pie shell, you can bake it straight from the freezer, though it might require a few extra minutes in the oven.
Frequently Asked Questions
- Can I use butter instead of shortening? Yes, you can use butter. However, shortening tends to produce a flakier crust.
- Why is my dough too crumbly? If your dough is crumbly, it might need more water. Add it slowly, a teaspoon at a time, until the dough holds together. Remember not to handle it more than you have to.
- How do I prevent the crust from shrinking? Chilling the dough before baking helps prevent shrinking. Ensure you don’t overwork the dough.
- Can I make the dough ahead of time? Yes, you can refrigerate the dough for up to three days or freeze it for up to three months. Thaw frozen dough in the refrigerator overnight before using. For best results, avoid bringing it to room temperature.
- Why is my crust tough instead of flaky? Overworking the dough or using too much water can cause a tough crust. Handle the dough gently and add water sparingly.
- Can I use a food processor to make this pie crust? Yes, you can make this pie crust in a food processor, but be sure to process it only enough to combine it. It’s more difficult to avoid overworking the dough using a food processor.
- Do I need to blind bake the crust? Blind baking is only necessary for certain types of pies, like custard pies when the filling is not baked. Follow your specific pie recipe’s instructions. When the crust is baked well, it will yield a golden brown edge.
- Should I use pie weights when baking the crust? Using pie weights (or dried beans) is beneficial when blind baking a pie crust to prevent it from puffing up or shrinking. Pie weights help maintain the crust’s shape and prevent air bubbles from forming.
- Is this a vegan pie crust recipe? Yes, this is a super easy VEGAN pie crust recipe. Crisco shortening is vegan and plant-based. It’s made from vegetable oil and contains no animal products.
- Can I use whole wheat flour instead of all-purpose flour? Yes, but the texture will be different. Whole wheat flour can make the crust denser and less flaky. If using whole wheat flour, consider mixing it with all-purpose flour for a better texture.
- How can I make the pie crust sweeter? To add a touch of sweetness to your pie crust, you can add 1-2 tablespoons of sugar to the flour mixture. This works well for sweet pies like fruit or custard pies.
- What should I do if the pie crust dough is too sticky? If the dough is too sticky, add a little more flour, one tablespoon at a time, until it reaches the right consistency. Be careful not to add too much, as this can make the crust tough.
- Can I make this pie crust gluten-free? Yes, you can make a gluten-free pie crust by using a gluten-free flour blend. Ensure the blend is suitable for baking. You may need to add a binding agent like xanthan gum if the blend doesn’t already include it.
- How do I store leftover pie crust dough? Wrap the leftover dough tightly in plastic wrap and store it in the refrigerator for up to three days. For longer storage, tightly wrap it in plastic wrap twice and then place it in a freezer bag. Freeze for up to three months. Thaw in the refrigerator overnight before using. Don’t bring it to room temperature, as it won’t roll out well and will yield a less desireable texture.
- Why does my pie crust shrink during baking? Pie crust can shrink if the dough is overworked or not chilled properly. Ensure you chill the dough thoroughly before baking and avoid stretching it when fitting it into the pie pan. Using pie weights during blind baking can also help prevent shrinking.
- Can I use this crust for savory pies? Absolutely! This versatile crust works well for both sweet and savory pies. If making a savory pie, you can omit the sugar or add herbs and spices to the dough for extra flavor.

Versatility of Pie Crust
Pie crust is extremely versatile and so much better than store-bought pie crusts. Here’s some inspiration for trying new bakes:
- Apple pie
- Pecan pie
- Cherry pie
- Chicken pot pie
- Savory pies, like quiche or meat pies

Creating a perfect pie crust is achievable with just flour, salt, water, and vegetable shortening. Using just a few simple ingredients, this dairy-free recipe ensures a tender, flaky texture every time. Follow these steps and tips, and you’ll have a delicious homemade pie crust that will impress every time. Happy baking!
Pin It

Extra Flaky Dairy Free Pie Crust
Ingredients
Method
- In a large bowl, combine the flour and salt. Whisk them together until well mixed.
- Remove 1/4 cup of the flour mixture and whisk into 1/3 cup of cold water in a separate bowl or measuring cup.
- Add the cold shortening to the flour mixture. Use a pastry cutter or two knives to cut the shortening into the flour. The mixture should resemble coarse crumbs with pea-sized pieces.
- Add the flour-water mixture to the flour-shortening mix and mix gently, just until combined. (Note: I like to use one hand for this, but a wooden spoon works well, too.)
- Gather the dough into a ball. Divide it into two equal portions.
- Flatten each portion into a disc and wrap each tightly in plastic wrap. (Note: if freezing, wrap the disc tightly in two layers of plastic wrap and place inside a freezer bag before popping in the freezer.)
- Refrigerate the wrapped discs for at least 15 minutes. This step is crucial for a tender, flaky crust.
- After chilling the dough, unwrap and place the disc between two piece of wax paper. (If you don’t have wax paper, lightly flour your work surface and rolling pin.) Roll out one dough disk into a circle about 1/8 inch thick. Ensure it’s large enough to fit your pie pan with some overhang.
- Carefully remove one piece of wax paper and lift the rolled dough and place it into your pie pan. Carefully remove the second sheet of wax paper and gently press the dough to fit the pie dish, leaving some overhang around the edges.
- Trim the excess dough, leaving about 1 inch hanging over the pan’s edge. Fold this under to form a thick edge. Crimp the edge using your fingers or a fork.
- If making a single-crust pie, add your pie filling. For a double-crust pie, roll out the second dough disk and place it over the filling as the top crust. Trim and crimp the edges as before. Bake according to your pie recipe’s instructions.
Leave a Reply